Introduction
TDM allows you to add external data sources that display real-time information within your presentations.
TDM supports the following external data sources:
-
Facebook
-
Twitter
-
Instagram
-
Yahoo Weather
-
Office 365 Calendar
-
Google Calendar
-
Flickr
-
Yammer
-
LinkedIn
-
Exchange
-
Power BI
-
NS
-
Axis (People Counter camera)
-
HikVision (People Counter camera)
-
Amadeus
-
Realworks
-
Zermelo
This guide explains how to add a Zermelo data source in TDM.
Note: The Zermelo data source is supported from version 4.4 and above.
TDM uses the Zermelo API to pull data, and you will need your endpoint and an API token from your Zermelo environment to complete the setup.
Requirements
To add a Zermelo data source, you need:
-
Administrator access to the TDM Designer
-
Administrator access to Zermelo to create or retrieve the API token
-
TDM version 4.4 or higher
Pre-Requirements for the Zermelo Data Source
- To create the Zermelo data source, you need two key values: Zermelo endpoint and API token.
- By default, your endpoint format is:
<subdomain>.zportal/api. If you’re unsure of your endpoint, please contact Zermelo support for assistance. - You need to generate an API token in your Zermelo environment. Make sure you have admin privileges, as these are required to create a token.
- Navigate to: Beheer → Admin-paneel → API Tokens
- Click ‘Toevoegen’ to create a new token.
Once created, copy the token — you will need it in the TDM Designer setup.
How to Create the Zermelo Data Source in the TDM Designer
-
Log in to the TDM Designer with an administrator account:
https://designer.tdmsignage.com -
Select “Config Panel” from the left-hand menu.

-
Open the “External Data” tab.
-
Click the “+” button on the right-hand side to create a new data source.

-
In the pop-up window, enter a name for your data source and select “Zermelo.”
Then click “Next.”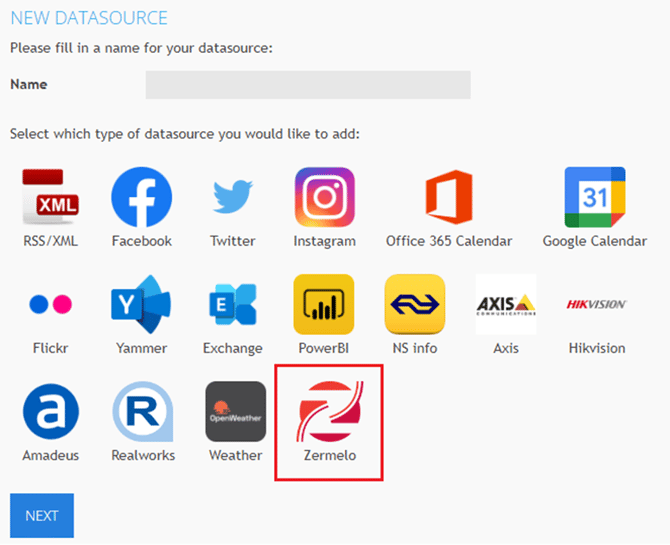
-
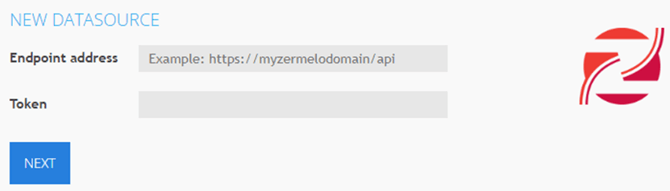
In the next window, enter your endpoint URL and token, then click “Save.”
-
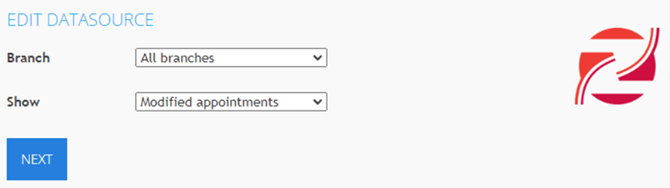
On the following screen, select which ‘Branche’ (location) you want to display in the XML.
-
This allows you to create a data source for one specific branch or location.
-
You can also choose between displaying ‘All appointments’ or ‘Modified appointments only.’
-
-
Once configured, click the eye icon next to the Zermelo data source to preview the retrieved information.
You have now successfully created a Zermelo data source in TDM.
Your signage can now display real-time schedule information from your Zermelo environment.