Introduction
TDM offers the ability to add external data sources. With these data sources, TDM can display real-time information within your presentation. TDM supports the following external data sources:
-
Facebook
-
Twitter
-
Instagram
-
Yahoo Weather
-
Office365 Calendar
-
Google Calendar
-
Flickr
-
Yammer
-
LinkedIn
-
Exchange
-
Power BI
-
NS
-
Axis (People Counter Camera)
-
HIKVision (People Counter Camera)
This guide explains how to set up the NS data source.
Requirements
If you want to set up the NS data source, you need to meet the following requirements:
-
Have administrator access to the TDM Designer
-
Have access to the NS API Portal (if you already have an account)
How To Set Up the NS Data Source
How to Create the NS API Token
-
Open the following webpage in your browser: https://apiportal.ns.nl/
-
Select “AANMELDEN” in the top-right corner, then choose “Externe bezoeker.”


-
If you do not have an account yet, select “Sign up now”; otherwise, log in with your account details.

-
Provide your email and other credentials, then select “Send verification code” to receive a verification code by email.
-
Check your email for the verification code and enter it on the NS webpage. Select “Verify code.”
-
After verifying, select “Create.” In the next screen, review your information and tick the checkbox to agree to the terms of use.
-
Click “Registreren.” You will now enter your NS API environment.
-
Go to the following webpage to subscribe to your NS token: https://apiportal.ns.nl/products/PublicNsApi
-
Select “Abonneren,” tick the box to agree to the terms of use, and select “Bevestigen.”
-
You will be redirected to your API profile. Select “Weergeven” under Primaire sleutel.

-
Make sure to copy your NS token — you will need it to create the NS data source in the Designer. You can use this token multiple times for different NS feeds. Please note that the NS API has a request limit of 1000 requests per 5 minutes.
How to Create the NS Data Source in the Designer
-
Log in to the Designer with an administrator account: https://designer.tdmsignage.com
-
Select “Config Panel.”
-3.png?width=105&height=108&name=mceclip0%20(1)-3.png)
-
Select the tab called “External Data.”
-
Click the “+” button on the right side to create a new data source.

-
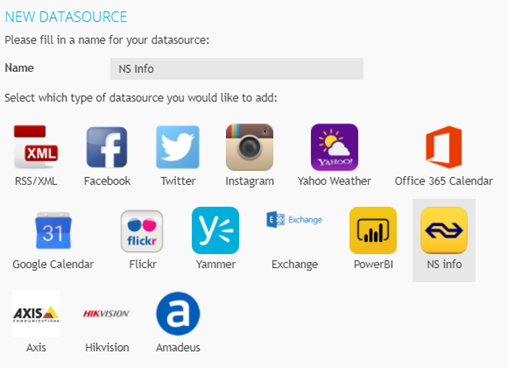
In the pop-up that appears, enter a name for your data source and select “NS Info.” Once selected, click “Next” to proceed with the configuration steps.
-
In the next window, select the train station you want to use for your data source and enter the NS API token you created earlier. Once entered, select “Save.”
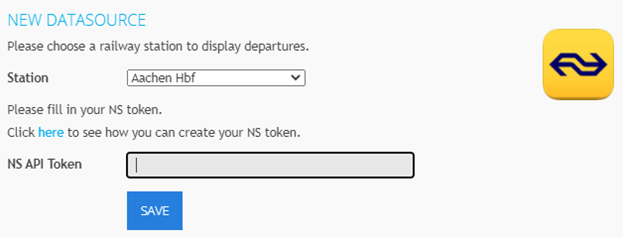
You have now successfully created the NS data source. You can preview the information from the data source using the eye icon in front of the data source.