Introduction
TDM5 offers the ability to configure elements to change their behaviour depending on the status of a meeting.
This example will show you how to setup and configure these elements.
Requirements
If you want to create a room booking solution you need to:
- Have content manager access or above to your TDM5 environment
For an interactive solution you will also need:
- Compatible tablet or display with touch functionality and optional LED support
How to configure elements for room booking
- Login to your TDM5 environment.
- Select “Designer”.
- Select the menu option called “Pages”.
- Open an existing page by selecting ‘Edit’ or create a new page using the ‘Add new page’ button
Edit existing page:
Add new page:
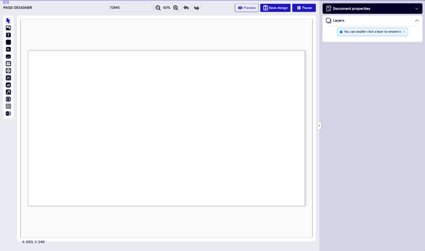
- You will be navigated to the content editor, from here you can design your page.
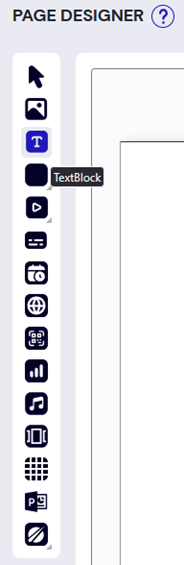
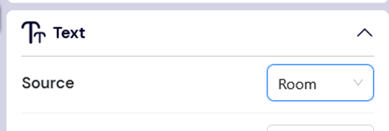
- Next you can edit or add a ‘Text’ element.
- Set the Source to ‘Room’ in order to make this a room booking element.
This will give you extra options: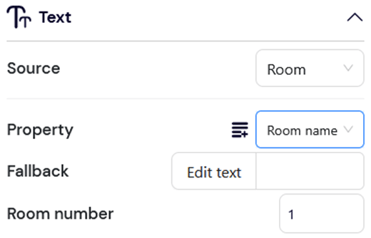
Property: Here you can define which information you want to show. (In this example we use Meeting Description)
Fallback: This will be your fallback text in case there is no information available
Room number: Here you can set the room in case of multiple rooms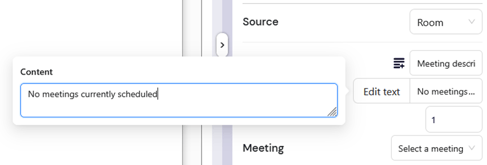
- We can also hide the entire element based on whether there is information available or based on status of a meeting. This is especially useful for image elements.
Click on the visibility configuration icon under ‘Visibility’.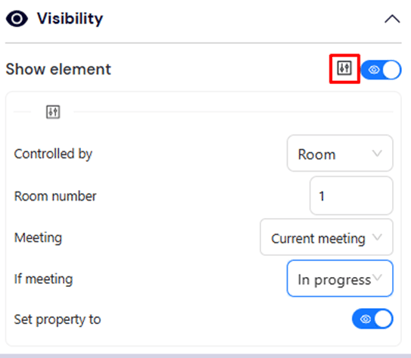
- Select ‘Room’ under ‘Controlled by’ and set the correct Room Number (in most cases this will be 1.)
- Select whether you want to control the element based on a current meeting or an upcoming meeting.
- In the bottom two configurations we can set the element to be either visible or invisible based on the meeting status. In the example above the element will be visible as soon as the meeting starts and will disappear when the meeting is over.
- We can also do this with the ‘Shape’ element and control the colour.
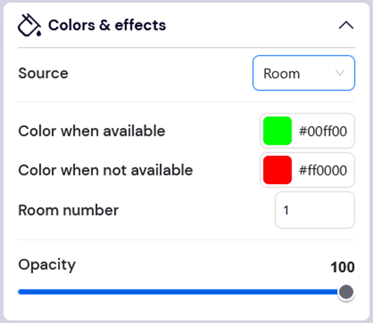
- Create a ‘Shape’ element and set the Source to ‘Room’. We can now set the colour of the shape based on whether the room is available or not. With this we can create a status on the room booking page to indicate availability. This is also tied to supported tablets with LED functionality.
For more information on how to setup a room booking solution please refer to our guide ‘How to setup room booking’ which is available in our knowledgebase.